DNS refers to (Domain Name System) it is the address book of the World Wide Web. Its work like a phone directory where we found all the phone number in a particular area and Domain Name System based on the same principle. In DNS all the domain name are stored in all over the world Like Google.com, Technobush.com, etc.
We know internet work based on IP (Internet Protocol) addresses like (192.168.1.1) but it’s too complicated to memories. DNS eliminate to memories these (192.168.1.1) IP addresses and mask them to a more human-friendly name like google.com or Microsoft.com etc. In this article we learn how to change DNS server on mac and windows 10 PC.
How to change DNS server in windows 10
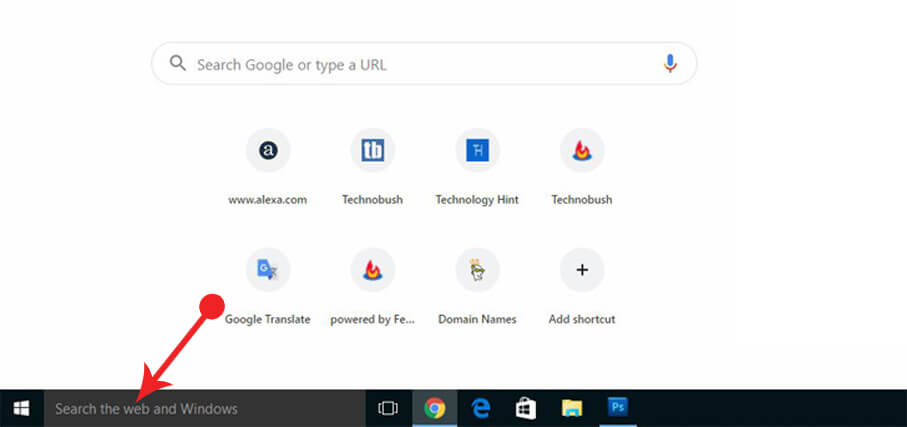
- Open your window 10 computer.
- Type Network and Sharing Center in the search area.
- Select your internet network adapter Wi-Fi or Ethernet. In my case I choose Wi-Fi.
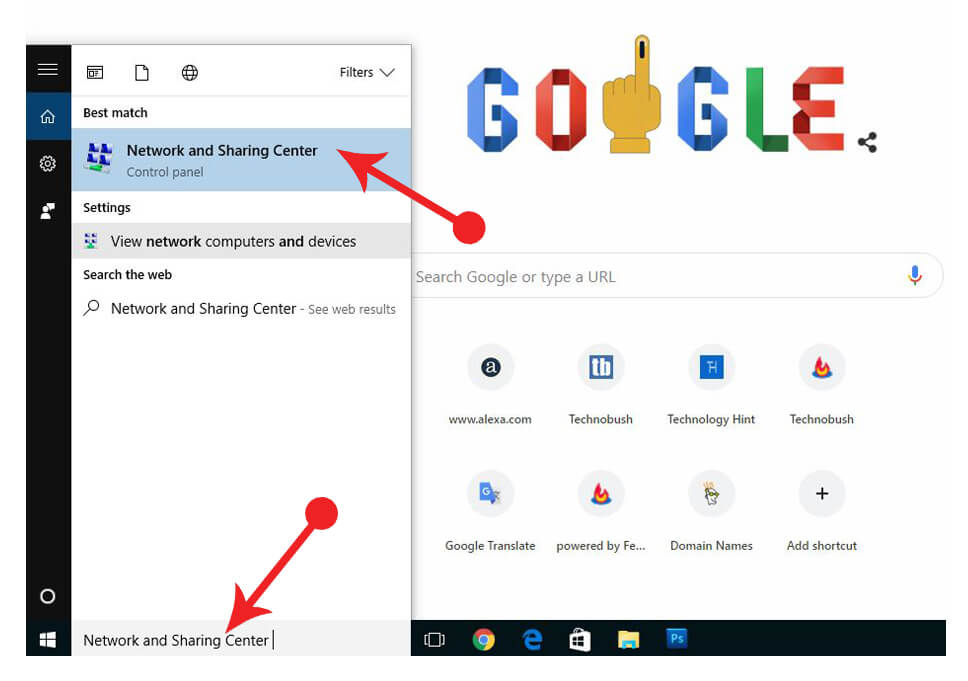
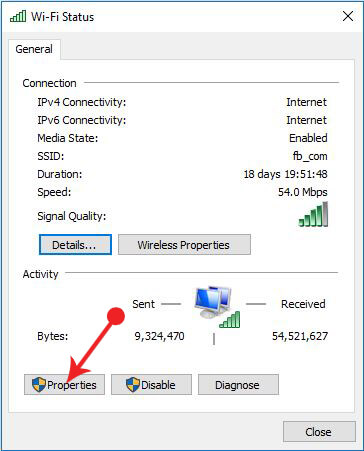
- Click on it, a new pop up window open click on the properties.
- Pop up window open, find Internet Protocol Version 4 (TCP/IP4).
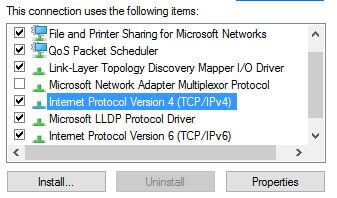
- Double click on that a new window open.
- Choose the “use the following DNS server addresses”, Instead of automatically obtaining DNS server addresses .
- Add your favorite DNS server, example “Google DNS, Cloud flare DNS, Open DNS” in the text box.
In my case, I choose Cloud flare DNS
- Preferred DNS server 1.1.1.1
- Alternate DNS server 1.0.0.1
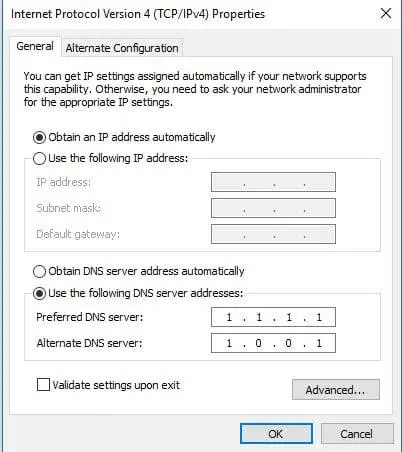
- Click Ok and close the window and restart your window 10 computer.
That’s it now your windows 10 computer run on cloud flare DNS server.
How to change DNS server in Mac
- Open your computer and click on the apple icon.
- Press on the Preferences option and then network after that Advance and finally select on DNS.
- Click on the “+” icon under the DNS server setting.
- Add your favorite DNS server “Google DNS, Cloud flare DNS, Open DNS” in the text box.
Finally, click ok and restart your computer to fully change the DNS server.